🟡 Edit your “Viber” element syntax in Automation 360

Newsletter Archive
SendPulse
Three Automation 360 updates
Caleb Smith

Caleb Smith

Product Marketer


“Today, we will explore how you can now edit the “Viber” element syntax in Automation 360, manually synchronize valuables when transferring contacts to your CRM system, and automatically extend students’ access to your online course.»

Edit your “Viber” element syntax in Automation 360

Edit your “Viber” element syntax in Automation 360

From now on, you can edit the “Viber” element syntax by adding punctuation marks and line breaks to service messages.

Here’s how you can edit your element syntax:

  • Select a message template from the list.
  • Click “Add punctuation marks.”
  • Add punctuation marks and line breaks.

The system will automatically check your template. If it doesn’t pass the moderation, you will receive the “Text of the message does not match the chosen template” warning, and you will not be able to save your changes. If it passes the moderation, you will be able to save your template and move forward.

Edit your "Viber" element syntax
Manually synchronize variables when transferring contacts

Manually synchronize variables when transferring contacts

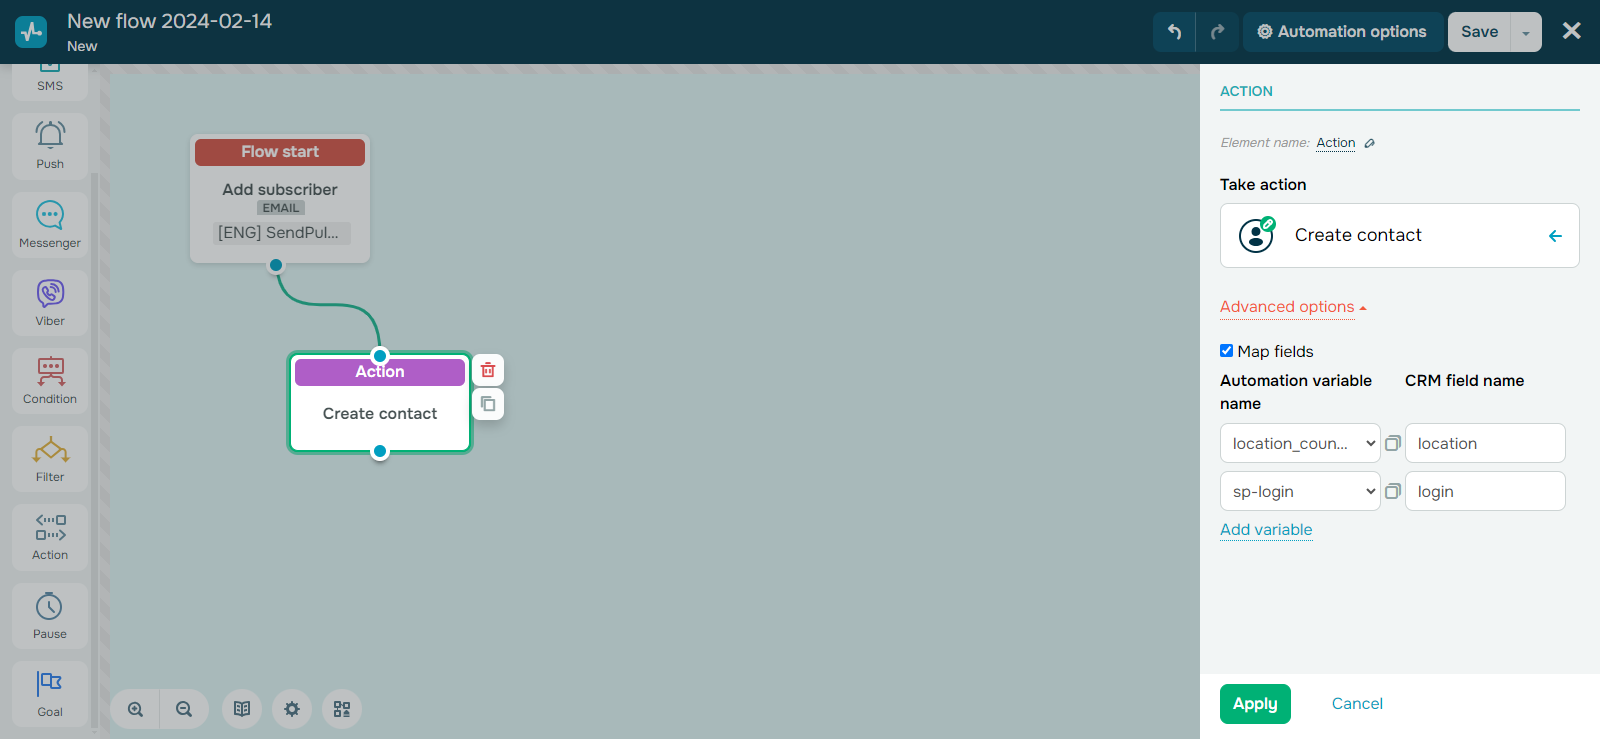
To ensure all of our services seamlessly integrate with our CRM system, we’ve added the option to manually synchronize variables when transferring contact data to your CRM.

To manually synchronize your variables, click “Additional options” and specify the variable names you want to synchronize.

Here’s how your selected start trigger will affect the synchronization process:

If your flow is launched by email service triggers, you can synchronize variables with any type of values. If the value type doesn’t match, your CRM system will automatically create a new variable with the corresponding value type to store your data.

If your flow is launched by CRM, online course, or custom triggers, you can only store variables with the “string” value type. If you attempt to synchronize other types of variable values, your CRM system will automatically create a new “string” variable to store your data.

Synchronize your variables manually
Change course access time limits automatically

Change course access time limits automatically

Previously, you could only use the “Change access time limits” option in the “Action” element to limit course access until a certain date or make it unlimited. Now, you also have the option to extend students' course access by a specific number of days.

If you’ve previously limited students’ course access until a date that hasn’t yet arrived, extending the limit will add your selected number of days to that specified date.

If your specified access expiration date has already passed, extending the access limit will add your selected number of days to today’s date.

If you haven't previously set any course access expiration dates, extending the limit will add your selected number of days to today’s date.

Extend course access automatically
icon

If you need help with setup or have any other questions, contact our tech support team — we're in touch 24/7.

Best regards, Caleb Smith

sendpulse.com

You received this email because you are a customer of SendPulse. 

Unsubscribe

Sent via

SendPulse